WebSphere MQ configuration
Activator supports the use of WebSphere MQ as a JMS provider. You can use WebSphere with Activator when you configure any of the following transports:
- JMS community trading pickup
- JMS partner trading delivery
- JMS application pickup
- JMS application delivery
Before you can use WebSphere with Activator, you must perform preliminary tasks in both the WebSphere and in the Activator environments.
Configuration in MQ Explorer
Working in MQ Explorer:
- Add an initial context.
- In the file system path, specify the path in the bindings directory where you want to store bindings file.
- Create a new connection factory of type “Queue connection factory”. Select Transport to be MQ Client if your MQ installation is on some other system than your Activator installation.
- Set properties for the QMGR you are trying to connect, hostname (listener port) of your MQ installation, and specify the Server connection channel you use for connecting.
- Create the destination JMS queues to use.
- When WebSphere MQ configuration is complete, copy the created
.bindings file to any folder on your JMS client machine.
Configuration of the Activator environment
Note: You cannot have multiple versions of the provider JAR files in the ...Activator/site/jars or ...Activator/corelib/db/ directories. For example, if you already have v7.5 IBM MQ JARs and add V8.0 JARs, you must remove the older JARS to avoid conflicts.
- Copy the following files from the MQ Installation JAVA path (Windows example:
C:\Program Files (x86)\IBM\WebSphere MQ\java\lib) to an Activator integration engine accessible directory (example C:\Axway\Activator\site\jars\).com.ibm.mq.jarcom.ibm.mqjms.jarconnector.jarfscontext.jarjms.jardhbcore.jarjndi.jarproviderutil.jarcom.ibm.mq.jmqi.jar
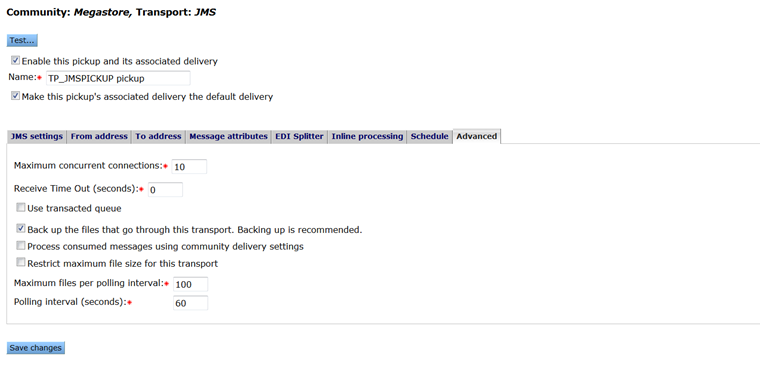
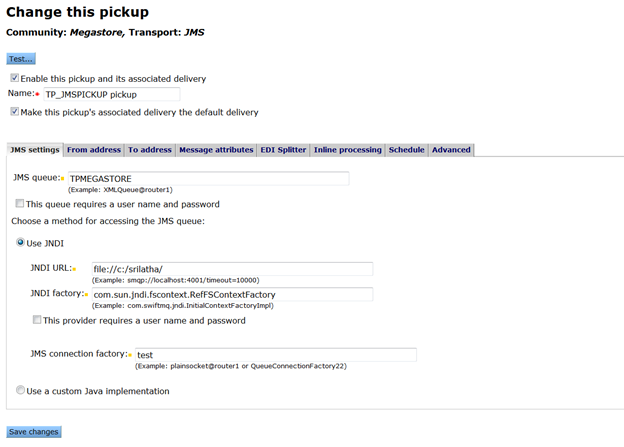
- Configure the Trading Pickup of type secure file (JMS) as a Community Delivery Pickup.
Example configuration / JMS settings tab:
Example configuration / Advanced tab: